What is Scrivener software?
Says Wikipedia:
“Scrivener is a word-processing program and outliner designed for authors. Scrivener provides a management system for documents, notes and metadata. This allows the user to organize notes, concepts, research and whole documents for easy access and reference.”
What it does not mention and is its main advantage: it allows you to produce an e-book, book print version, a PDF of your book and more.
Read more about it: https://www.literatureandlatte.com/scrivener/overview
Learning then using
I still use version 2 for MAC; a newer version 3 is out but I can’t use it on my old MacAir.
It took some time to get familiar using Scrivener as it is a rather unusual software. I had to view several times the many video lessons before I managed to use it correctly.
Once I started using it for the jokes and worked on my notes for the book no. 3 I fully understood the advantages of Scrivener. Simply said, Scrivener is a must.
Back in Beijing it still took me some time to complete the final output. And then I did ran into a brick wall when I tried to deliver the print and e-book versions.
I needed to finish first the output for the print version because the cover design company needed to know how many pages the book had. It was frustrating. Nothing went right. I was close to give up but then tweaked and tweaked the settings till one day it worked. For the print I could not really finish the task as it turned out correctly setting the margins and the positions of header and footer were not possible within Scrivener. I solved it by exporting from Scrivener to MS Word, something that worked well. The Table of Content is a bit tricky to format correctly but one needs to keep in mind it is NOT a Word ToC but a list of links where one must “update links”. Inside MS Word I was able to fine-tune the choice of font type and size as well as the headers and footers. Also to fine tune all pages so they would look nice – e.g. no title of a joke at the bottom of the page, shifting it to the top of the next page. Last step converting into PDF – the format requested by Amazon for the print.
CreateSpace is now history and Amazon directly handles the print too, making it much more easy.
Finally getting there
Once the problems with the print version were solved, the output of the Kindle files was much easier. Basically the challenge is to get the settings right in the compile dialogue, combined with the right settings for each document in the chapters (the settings are pretty much linked). In my case, see the screenshot:
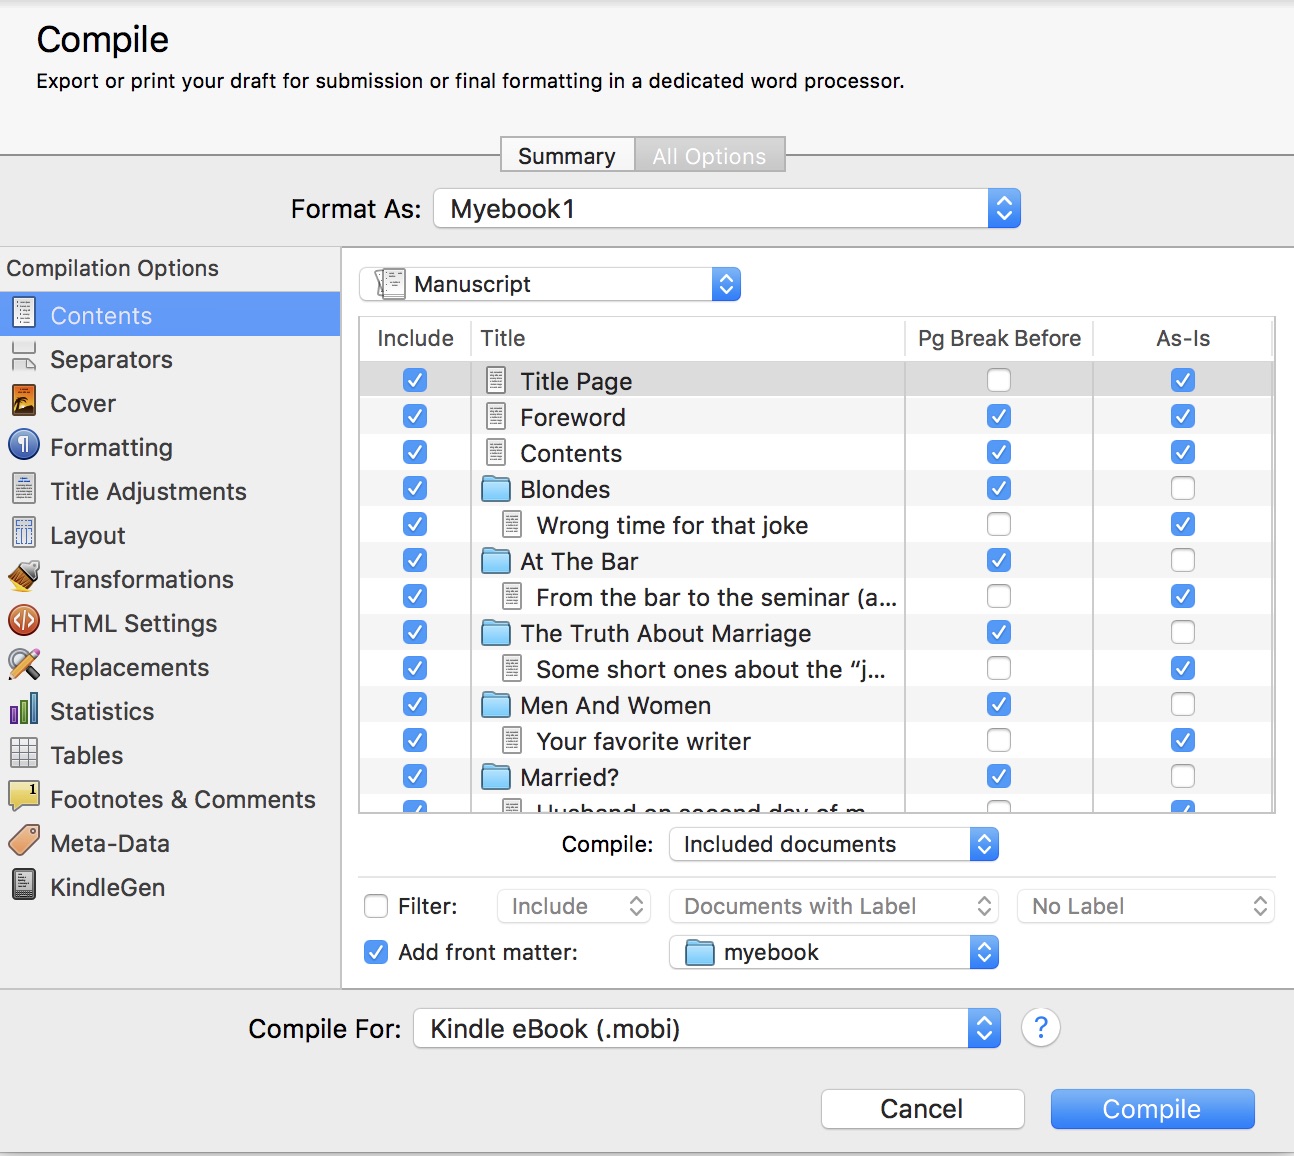
the compiling dialogue
There are some add-ons to Scrivener that allow you to test the Kindle version in the Kindle app on the Mac desktop. The only tricky thing was to delete the old versions in the Kindle app: one needs to go into the (hidden) folder of Kindle in the MAC and there manually delete the old files. I was also able to put the test Kindle file in my iPhone to see how it behaved.
You must have a table of content
Amazon requires your book to have a table of content, and – it must be at the beginning of the book, not at the end.
So I was forced to artificially create a table of content for the mountain of jokes. Obviously the result is rather artificial and not always logical… Well I had no choice but to be creative, inventing chapters and making sure the length of the chapters was not too unevenly spread. It took some time… and finalizing it was easy with Scrivener.
2 thoughts on “Using Scrivener”